Run a phishing campaign for a client
Launch a phishing simulation against a client org from the MSP portal — pick the client, template, audience, and go.
As an MSP, you have two paths to launch a phishing simulation in a
client org. You can drop into that client's portal via the org switcher
and use the standard flow at /org/phishing/campaign, or stay in the
MSP portal and use the cross-client wizard at /msp/phishing/campaign.
The MSP wizard is the right default when you're running campaigns
across your book — it keeps the global campaign list, client switching,
and per-client status in one place. Use the client-portal flow only
when you're shoulder-surfing a single launch with that client's admin.
Before you start
Prerequisites
- You're signed in to the MSP portal and the client org you want to
target appears in your Phishing Campaigns list at
/msp/phishing. - The client org has users imported and at least one group, if you plan to target groups instead of all users. See Manage client accounts if a client is missing or shows as not-configured.
- You've cleared the test with the client's primary contact. MSPs catch more flak from surprise simulations than from any other workflow — give them a heads-up.
Open the MSP campaign wizard
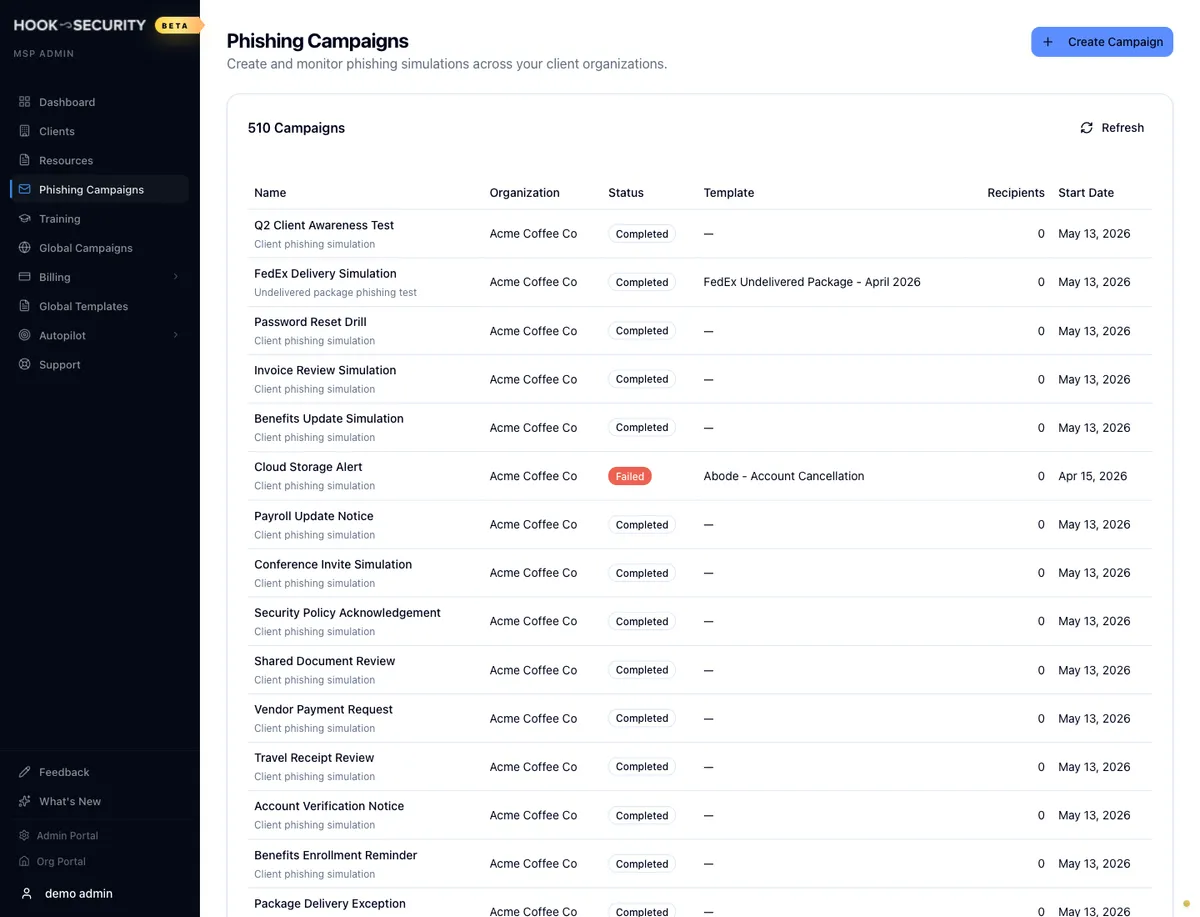
From the MSP sidebar, go to Phishing. The Phishing Campaigns page
lists every campaign you've launched across your client book, with
columns for Name, Organization, Status, Template,
Recipients, and Start Date. Click any row to open the campaign
detail at /msp/phishing/<campaign-id>. To start a new one, click
Create Campaign in the top right.
Walk through the wizard
The MSP wizard has five steps — one more than the org-admin version. The extra step is Select Orgs at the front, where you pick which client (or clients) the campaign runs in. Steps 2–5 mirror the org-admin Run a phishing campaign flow. A summary cart on the right shows your selections at every step.
Select Orgs
Pick the client organization you want to target. Each row shows the client's name and a Ready or Not configured badge — only Ready clients are selectable. Use the search bar to filter by name; use Select all eligible to pick everyone at once if you really do want a fleet-wide test. The wizard caps you at 25 organizations per campaign.
For a normal single-client launch (the focus of this guide), check just
one row — say acme-coffee.test — and click Continue. If you select
two or more clients, targeting collapses to all users in each org in
step 3, since group selection only makes sense inside a single org.
If a client shows 'Not configured'
That org isn't set up for phishing campaigns yet — usually a missing PhishingBox connection or an unassigned phishing domain. Open it from Manage client accounts to finish provisioning before you launch.
Campaign Details
Give the campaign an internal name like
Q2 2026 Awareness Test — Acme Coffee. The name is for your team and
the client's audit trail; it never appears in the phishing email.
Add an optional Description for context — typical content here is the client's request ticket number, the SOW phase, or the follow-up training plan. Under When should this campaign send?, pick Send immediately. Scheduling for a later send is shown as Coming Soon and is disabled today.
Targeting
Choose who in the client org receives the simulation. Hook offers three recipient modes for a single-client campaign:
- All users — every active user in the selected client.
- Include specific groups — only users in the groups you check.
- Exclude specific groups — everyone except users in the groups you check.
Group lists are scoped to the client you picked in step 1, so the groups you see are the client's groups — not a merged view across your book. Each group row shows a member count badge. As you change your selection, the Estimated recipients card at the bottom updates live.
Multi-client targeting collapses to all users
If you selected more than one org in step 1, this step is replaced by a banner explaining that all users in each org will receive the campaign. Group-based targeting requires a single-org selection.
Template
Pick the phishing email. The template list shows name, subject, a short description, and badges for Difficulty (Easy / Medium / Hard) and Category. Search by name or subject; filter by category, difficulty, or sort. Hover any row and click Preview to render the full email and landing page in a side sheet.
The template library you see here is the shared MSP catalog — the same stock and custom templates you'd see in any of your clients' org portals. Click a row to select it; a green check appears on the selected card.
Review & Launch
The final step lays out everything: the Organizations badge row, the campaign name and description, Timing (Immediate), recipient mode plus estimated count, and the chosen template with its category and difficulty. The green Ready to launch banner restates the audience in plain English.
Click Launch Campaign for 1 Organization. Hook creates the campaign
in the client's org, syncs it to the underlying delivery provider, and
drops you on a results screen showing each org's launch status, the
campaign ID, and the enrolled user count. From there, click Go to
Campaigns to return to /msp/phishing — the new campaign is at the
top.
Monitor the campaign
Click the new row in /msp/phishing to open the campaign detail at
/msp/phishing/<campaign-id>. The page is the MSP-portal mirror of the
org-side view, with one extra header line for the Organization name
so you don't lose track of which client you're looking at.
You'll see:
- A status badge (Pending, Active, Completed, Failed) and a Refresh button.
- A stats strip with five tiles: Enrolled, Sent, Opened, Clicked, Reported. Sent / Opened / Clicked / Reported start filling in once delivery begins.
- A Campaign Info card with the client name, type, template, start date, created timestamp, and the upstream campaign ID.
- An Enrolled Users table scoped to the client.
The full report — KPIs, risk score, recommended training, share / export controls — lives at the org-level Reports surface inside that client. The interpretation is identical regardless of which portal launched it; see Read the executive summary report for the breakdown.
MSP-specific things to know
Branding, billing, and visibility
- Per-client branding. Outbound phishing emails and the landing
page render with the client's phishing domain and from-name, not
your MSP's. A campaign launched from
/msp/phishing/campaignforacme-coffee.testlooks identical to one launched from the client's own portal. - Billing impact. Each enrolled user in a phishing campaign counts against that client's seat usage in the same way as a direct org-admin launch — there's no separate MSP-launched meter.
- Visibility for the client admin. The campaign appears in the
client's own
/org/phishinglist immediately, with the same name and template you picked. Don't pick an internal-only name (like "Steve from Acme keeps clicking") that you wouldn't want their org admin to see.
Common pitfalls
- A "Not configured" client looks selectable but isn't. The checkbox is disabled and tooltipped, but the row still shows in the list. If you don't see your client as Ready, finish the PhishingBox provisioning step in Manage client accounts before starting the wizard.
- Switching orgs in step 1 wipes step 3. Changing your selection in Select Orgs resets your group selection in Targeting and the estimated user count, since groups are org-specific. Pick the client first, then build out targeting.
Related
Manage client accounts
Provision, configure, and audit downstream organizations from the MSP portal.
Assign training across clients
Push a training plan into one or more client orgs from a single workflow.
Manage phishing templates
Browse, duplicate, edit, and delete custom templates that show up in the wizard library.
Manage your client accounts
Use the MSP portal to read your portfolio, find a specific client, and open per-client dashboards for campaigns and training.
Assign training across clients
Run training enrollments from the MSP portal — pick one or more clients, choose courses, schedule, and track completion.